I have had this recipe for years in an old book, and have never had access to rowan berries to make it !
This year I am on a mission to hunt some down - but I'm unsuccessful as yet...
Homemade wine is always fun and well worth the effort.
So here is the recipe (imperial not US measurements)
Rowan Berry Wine
4 pints of Rowan Berries
1 gallon (8 pints) Water
3 lbs white Sugar
1 lb Wheat
2 heaped tablespoons Raisins
Wine Yeast & Yeast Nutrient
1. Boil the water and pour it as soon as you can over the rowan berries, boiling if possible.
2. Let the rowan berries and the water stand for 5 days, covered. Stir them and mash them daily.
3. After 5 days put the sugar, chopped raisins and wheat into a very large bowl or similar. Strain the rowan berry mixture over the ingredients in the bowl and discard the bits or rowan berry mash once strained.
4. Stir it well until the sugar is dissolved.
5. Put a sachet, or a level teaspoon of the wine yeast into a small glass with a small bit of warm water and a teaspoon of sugar. Stir. After 15 minutes it will be foaming.
6. Put the foaming yeast mix into the rowan berry mix in a large covered bowl or food grade plastic bucket. Stir it in.
7. Leave for 7 days covered very well.
8. Then strain the liquid into a glass demijohn (fermenting jar), fit an airlock and leave until fermentation is finished (no more bubbles) and the wine is clear.
9. Rack the wine off into a clean demijohn. (To rack off is to syphon it off of the residue left in the bottom of the jar into a clean jar.) Sometimes you need to do this more than once every couple of months, until its clean and clear.
10. Leave in storage for at least 3 months after last racking.
11. Then bottle your wine.
It's best kept at least a year before drinking, but people rarely wait that long !
Friday, 30 October 2009
Wednesday, 28 October 2009
Colcannon & the Tradition of Halloween
As All Hallows' Eve, Halloween or Hallowe'en is fast approaching, I thought I would find out some suitable recipes and share with you the roots of this very interesting and fun festival.
Halloween's roots are in the Pagan Celtic festival of Samhain, which later the Christian church amalgamated with All Saint's Day. The Christian church did this with many Pagan festivals and traditions, as a means of encouraging the Pagan populous to more easily accept and join the Christian church. Sneaky huh.
The word Samhain comes from the Old Irish for 'summer's end', although this is a very rough translation. Samhain celebrates the end of the lighter half of the year and the start of the darker half. Some people still refer to it as the Celtic new year and the Pagan ancient Britons held a similar festival called Calan Gaeaf.
The festival has always had an element of a festival of the dead. This type of festival is very common around the world, especially in cultures that are still close to their Pagan roots. The ancient Celts and modern day Pagans believe that the dividing line or border between the land of the living and that of the dead, is at its thinest at Samhain, thus the belief that spirits can visit our land of the living on this evening.
It was and still is for many people, a day to remember and commune with their dead ancestors, as well as a time when you try to keep away the more harmful spirits. It is believed that this is where the custom of wearing masks etc came from, in order to scare away evil and uninvited spirits from the house and the celebrations.
I still have a bonfire on Halloween which has been a family tradition I can remember my great grandmother practising, and probably all my ancestors before her.
I also read somewhere that 2 bonfires were common, with the people and their livestock walking between the 2 in order to 'cleanse' them.
So, rather than wondering that Halloween has become more and more colourful and wild in recent years, and blaming commercial interests, think of it this way. We are, in fact, celebrating it more in the spirit that our Pagan ancestors did, albeit most people without the Pagan religious aspect. In my mind this is a good thing, as this is a very important festival and a very important point in the year for anyone who lives close to nature, or is even just a keen gardener.
Another important ancient Pagan tradition, that carried on until extremely recently in Christian times, was that the fire in the house was put out on October the 31st, and lit again from the bonfire used in the festival. At that time (and still in some places in Ireland) you never let your household fire go out, it burned night and day all year, apart from on Halloween, when it was doused.
If anyone would like to share their ancient cultural traditions of Halloween, please just let me know in an email and I will post it here. Alternatively you can add it as a comment, although I think less people read the comments.
And so to Colcannon...
Concannon was once a basic staple food of the less well off classes in Ireland, as potatoes and cabbage were all many people had available at times.
Years ago (and in some houses still today) Colannon was traditionally served on Halloween, and wrapped up gifts of small coins were hidden in it. In more modern times this tradition seems to have been transferred to the Halloween Brack here in Ireland.
Colcannon is traditionally made with kale, although dark leaved cabbage works fine. Kale has a much darker colour and a slightly stronger taste. Colcannon is similar to Champ, but champ doesn't contain the kale or cabbage.
Colcannon
1 lb Kale or dark green leaved Cabbage (finely shredded with no stalks)
1 lb Potatoes (unpeeled)
6 Scallions (also called spring onions outside Ireland) (Chives will also do at a push)
1/4 pint Milk or Cream
4 oz Butter
Salt & Pepper to taste
1. Boil the kale in a pan of salted water until it is very soft and tender, maybe 15 to 20 minutes.
2. At the same time (if you can manage it) boil a pan of the potatoes with their skins on and whole, until they too are tender.
3. Heat the milk and scallions up to a boil in another pan, and then simmer them on low for about 5 minutes
4. Drain the kale and mash it up.
5. Drain the potatoes, peel them and mash them well too.
6. Once the potatoes are mashed, add in the hot milk and scallions. Beat this well until it is really fluffy.
7. Then beat in the kale, adding salt and pepper to taste, and half the butter.
8. Heat the finished dish through well, in an oven or similar, before serving fresh. Use the remaining butter to drop a knob on top of the colcannon as it is served on each plate.
Tuesday, 27 October 2009
Monday Drive Around the Burren & East Clare Coast
Monday was October Bank Holiday here in Ireland and that means PARTY. But, sadly, not for me as at the moment I'm just not able for it.
I decided to ask my friend Kathleen if she would like to come with me on a wee drive around the east Clare coast of the Burren, to La Hinch and to The Rock Shop at Liscannor.
The Rock Shop is probably my favourite shop in Ireland - it's downright dangerous walking in there...
And to add to the danger... there's a coffee shop...
 This was my toasted cheese, ham and onion (raw-a fetish of mine) sandwich.
 This was Kathleen's sandwich, untoasted. She went for the healthy stuff and let them put lettuce in it.
We both grabbed a bag of these lush English crisps, called Darling Spuds, hand made and deliciously flavoured.
Their web site http://www.darlingspuds.co.uk/ is great fun. And their address is 'Salty Towers' ! For real.
This pic was my choice of flavour - West Country Cheddar (cheese), Leeks and Pink Peppercorns - they were truly tasty.
I also had a bottle of pink grapefruit (another fetish of mine) with spring water.
 We then went to La Hinch to oggle, opps I mean observe, the surfer dudes doing their stuff on the incoming Atlantic swell.
There were some good waves now and then, for the patient few.
The great thing about La Hinch, is that you can not only watch the surfers surf, and gaze at the wonderful scenery, but they park right beside the promenade and one can't help but oggle, opps I mean glance at, the guys changing in and out of their wet wetsuits. Another fetish ? No... merely images taking me back to my long lost youth...
That's my excuse.
 Just stunning huh
Shame about the other people and the town ! Having said that the town has some quaint shops and a fun art gallery (Kenny and no NOT the Kennys of Galway). And some of the people do wear wet suits...

It's even better in the dead of winter as far less people come here - just the hardened surfer dudes...

Opps I added this one twice and it's a pain deleting them... I seem to manage to delete all sorts...
 This was taken at what I think is Liscannor Harbour, on the pier just about...
Read the white writing on the door of the carriage/caravan...

This is the fishermen's tea room ?
This is right on the pier, and is so colourful and quirky it's incredible.

I managed to gather these on Sunday afternoon. Just threw them in here as it's incredible we can still pick blackberries at this time of the year !
Those are wild rose hips I also gathered at the same time. I'll dry them probably and use for tea.

Just perfect.
Monday, 26 October 2009
Orange Snowballs
A few years ago a very good friend of mine who knows of my addiction, errr I mean my joy, towards cookbooks, gave me an amazing book. It's called 'Cookies For Christmas'.
Oh My
Lethal
The book is American and not published over here at all, so I have no idea where she bought it, online maybe. Therefore the measurements are all American, so the stateside bloggers will love it ! If you would like to try and find it, it is written by Jennifer Darling for Better Homes & Gardens (a magazine ?).
Here is one of the recipes. I thought it would be good for Halloween as they are orange and round, and you can maybe pretend they are eyes or something equally gory...
They do also make a lovely present given in a pretty gift box.
Orange Snowballs
1 cup Butter (soft)
3/4 cup Icing Sugar (sifted) (powdered sugar in the US)
1 tablespoon finely shredded orange peel
2 teaspoons finely shredded orange peel (keep these 2 peel piles separate)
1 tablespoon Orange Juice
2 2/3 cups Plain Flour (all purpose in US)
3/4 cup white granulated Sugar
1. In a big mixing bowl beat the butter until soft and fluffed.
2. Add the icing sugar and beat then together until they are well combined.
3. Beat in the orange juice.
4. Beat in the flour bit by bit until it is all completely combined, including 1 tablespoon of the orange peel with the last of the flour.
5. Shape the dough into 1 1/4 inch balls.
6. Place the balls 2 inches apart on an ungreased baking tray.
7. Cook in an oven heated to 325F for 15 minutes, or until the bottoms are just lightly browned.
8. Remove from the oven and leave to cool on the baking tray for 5 minutes.
9. Meanwhile, in a blender or food processor if you have one, a strong arm with muscles and a bowl if you don't, combine the 3/4 cup of white granulated sugar and the 2 teaspoons of orange peel. Beat/blend until this is totally combined. This really is better in a blender if possible.
10. While the cooked cookies are still a bit warm, roll them in the sugar mixture and place them on a wire rack to totally cool.
It is possible to buy edible gold glitter. This can be added to the blended granulated sugar and orange peel that you roll the balls in. They then look like glitter balls !
Great also for Christmas food...
Sunday, 25 October 2009
Halloween & Curried Pumpkin Soup
What's Halloween to me ?
I basically turn into a she-devil at Halloween !!!
I love all the dressing up and having fun
I love the fact that adults let loose and have fun too and act like kids
I basically turn into a she-devil at Halloween !!!
I love all the dressing up and having fun
I love the fact that adults let loose and have fun too and act like kids
So this year I will transform myself into a witch as usual and deck the cottage out with candles and pumpkins, dour music, witches broom and ghosts hanging from the trees....
And of course I will make a load of little cakes and cookies for the very few visiting kiddies who dare to walk up my drive and knock on the door.... Some years none come, and others maybe 2 or 3 carloads. It's usually by appointment as they like to check I will be there and 'performing'. Hmmmm
So to start off Halloween week - a really nice Pumpkin Soup recipe, Curried Pumpkin Soup. It contains coconut milk which I adore in anything (almost) !
Freezes great so you can make tonnes from all those HUGE pumpkins from the supermarkets (or your garden ?), and have great spooky lantern faces on the lawn !
Curried Pumpkin Soup
2 lbs Pumpkin flesh
2 tablespoons Butter
2 Onions (finely chopped)
2 cloves Garlic (minced)
1.5 tablespoons fresh Ginger Root (peeled and minced)
2 teaspoons ground Cumin
1 teaspoon ground Coriander
1.5 teaspoons Sea Salt
3/4 teaspoon ground dried Chili flakes
7 cups of Water
1.5 cups good Chicken Stock (or Vegetable stock for vegetarians)
1 can Coconut Milk (14 oz can)
1. In a large saucepan, heat the butter until melted and saute the onions until soft (about 5 minutes).
2. Add the garlic and the ginger, and keep cooking for another 1 minute, remembering to stir now and then.
3. Add the cumin and coriander and stir it all well to blend things properly in together.
4. Add the sea salt, the chili flakes, the water and the stock, as well as the coconut milk. Mix it all in well and simmer uncovered for 30 minutes.
5. Puree the soup until it's smooth, either using a powerful hand blender (this is my way of doing it as less washing up), a normal blender or a food processor.
6. This soup can be eaten straight away, or will last for 1 day in the fridge. Otherwise you will need to freeze it.
Saturday, 24 October 2009
Banana & Apricot Cake
This is especially for Irish to bake for her Bogman on a Sunday...
To make up for his deprivation over his dearly departed archaic PC parts, a little sugar and carbohydrate fix is in order. Hopefully Irish has all this in her kitchen !
Banana & Apricot Cake
3.5 ozs Butter (chilled and chopped in little pieces)
8 ozs Self Raising Flour
2 3/4 ozs Caster Sugar
2 ozs dried Apricots (chopped)
2 ozs Raisins
2 Bananas (roughly mashed)
2 tablespoons Honey
2 Eggs (beaten)
1. Rub the butter into the flour in a large bowl until it looks a bit like fine breadcrumbs.
2. Stir the sugar, chopped apricots, raisins, bananas, eggs and honey into the dry ingredients. Mix until it is nice and soft.
3. Spoon the mixture into a 2lb loaf tin, which has been greased with butter and is lined on the bottom with a piece of greaseproof paper.
4. Level off the top.
5. Bake in an oven heated to 160C / 325F / Gas Mark 3 for about 1 hour. A thin skewer should come out clean when poked into the middle of the cake.
6. Remove from the oven and leave to cool in the tin. Then turn it out onto a wire rack to cool totally.
7. You can eat while still a bit warm, or otherwise sliced when cold. It will last a few days safely in an airtight container. IF you don't eat it all at once...
And Boogie - This is so simple that if she burns it you can make her dump all HER old and cherished computer toys...
Monday, 19 October 2009
Blackberry Syrup
I made this this afternoon with a few blackberries I picked in my bottom field.
Its reasonably quick and easy - and the result is the most fresh tasting and vibrantly coloured ice cream sauce you can imagine !
Of course you can use for many other things too.........
I measure the fruit and sugar in cups or mugs or whatever you please !
Blackberry Syrup or Sauce
Freshly picked Blackberries
White Sugar
Water
Lemon Juice
1. Wash the blackberries to remove bits and wildlife...
2. For every cup of blackberries, use a 1/4 cup of water.
3. Put the blackberries and water into a large saucepan.
4. With a potato masher or something similar, squish the fruit down well, to release the juice.
5. Bring to the boil and then reduce the heat to simmer.
6. Simmer for about 5 minutes, or until the fruit is soft.
7. Pour the pulp/fruit mash through a fine sieve or a muslin/jelly bag, into a bowl. Don't push it through harshly, let it drip and just encourage it gently by pressing it with a spatula or similar.
8. Once the juice stops running through, measure the juice and discard the pulp to the compost.
9. For every cup of juice add a cup of white sugar, and put all this back into the cleaned saucepan with about 1/2 teaspoon of lemon juice per cup of juice.
10. Bring it to the boil and stir to dissolve the sugar.
11. Reduce the heat to low and simmer until the liquid becomes slightly viscous, but still runny. This should only take a minute.
12. Pour into sterilised jars while very hot and seal immediately.
Will keep for months and months.
Blackberry & Apple Jelly
Blackberry and Apple Jelly is sometimes called Bramble Jelly, which is a name I kinda like... it describes the time of year that these 2 fruits arrive and are plentiful, and the time of year when you spend most of your time preserving things for the winter and the year to come.
Kind of like Squirrel Nutkin, stashing away all manner of wonderful stuff to ensure that you have a pleasant and healthy winter ahead !
This is fairly easy to make and is incredible with chicken, turkey and even pork maybe.
Blackberry & Apple Jelly
3 lb Blackberries
2 large Bramley Cooking Apples (or any other cooking apples)
3/4 pint Water
Juice of 1 lemon
White granulated Sugar
Muslin cloth (or old tea towel or a jelly bag)
1. Wash the animals and dirt from the blackberries, being careful and only lightly rinsing, as you can easily wash away precious juice.
2. Peel, core and chop the apples.
3. Set the muslin cloth up over a large bowl. Make sure that the cloth is sterilised and immaculately clean.
4. Put the blackberries, apples, lemon juice and water in a large heavy bottomed preserving pan, and bring it to the boil.
5. Once boiling, reduce to a simmer on a low heat for 20/25 minutes, until all the fruit is nice and soft.
6. Tip the whole lot into the jelly bag or muslin cloth over the bowl, letting the liquid drip through.
7. DO NOT SQUEEZE OR PRESS IT THROUGH.
8. Leave this to drip through, a minimum of 8 hours, no more than 9 or 10.
9. Use the dripped through juice and discard the rest onto your compost heap.
10. For every 1 pint of juice, use 1 lb of the sugar.
11. Put the juice and sugar back into the clean pan and heat gently until all the sugar is dissolved.
12. Then bring it to the boil and simmer for 10 to 15 minutes, or until setting point is reached.
13. Skim off any scum from the surface and pour the jelly into freshly sterilised jars, right to the top. Put the lids on straight away to create the vacuum and the seal while hot.
14. Store in a cool and dark place.
Saturday, 17 October 2009
Incredibly Yummy Rich Chocolate Nut Cake
Brace yourselves....
This is multi calorific
for serious chocoholics
and anyone who likes 'indulging'...
This recipe is adapted from one I found years ago in one of my cook books... and it was in cups. I have never bothered to convert it so I apologise. I have a lovely stainless steel set of cups - very useful and so easy to use.
Incredibly Yummy Chocolate Nut Cake
Cake
1/2 cup plain Flour
1/2 cup Cocoa
1 teaspoon ground Cinnamon
1 cup sliced Almonds
1 1/4 cups Brazil Nuts (chopped)
1 1/2 cups dessicated coconut
1/4 cup stem or glacé Ginger
1 1/2 cups currants
250g dark Chocolate (chopped)
1/4 cup Honey
1/2 cup Orange Marmalade
60g Butter
Icing
5.25 ozs (2/3 cup) dark Chocolate
2 ozs Butter
The Cake
1. Mix the nuts, the coconut, the ginger, the currants, the cinnamon, the cocoa and the flour in a big bowl.
2. In a saucepan gently heat (low setting) the chocolate, butter, honey and marmalade until melted and well blended together. Stir all the time.
3. Stir the melted choc mixture into the dry ingredients in the bowl.
4. Take an 8 inch round oven-proof flan tin, grease the sides and base and line it with greaseproof paper.
5. Press the cake mix into the base of the flan tin.
6. Bake in the oven for about 45 minutes, at roughly 140/150C. Keep an eye on it as I may need longer, or shorter. Either way cook it until its firm.
7. Leave to cool in the tin. When cool turn out onto a wire rack.
The Icing
8. Mix the chocolate and butter in a bowl. Stir well until it is very smooth.
9. When the cake is cool/cold, spread the icing all over the surface, top and sides. Put it in the fridge to set.
Eat this with thick cream if you are really brave...
You can freeze this for 2 months, and it will happily keep for a week until you need it when freshly made. Keep it covered and stored in the fridge (if not frozen).
Friday, 16 October 2009
Sophii's Shepherds Pie & Cottage Pie
I have been making Cottage Pie since I was knee high to a grasshopper... and it will always be one of my comfort food favs.
Did you realise that the only difference between Cottage Pie and Shepherds Pie was the animal that the minced meat comes from ?
Shepherds Pie is made from minced lamb (yes the cute and fluffy little bouncy white critters) and Cottage Pie is minced beef (teenage moo cows).
Simple.
About a year ago I told a very good friend of mine in Alabama how I made Cottage/Shepherds Pie. He bought some chicken breast and used that instead ! I was horrified... But he maintains it was delicious and has christened the result 'Chicken Coup Pie'. Thank you Terry !
I really will have to try it sometime...
Bon appetit !
Sophii's
Cottage Pie & Shepherds Pie (how my Granny taught me to make it)
1 lb minced Beef (or Lamb) (or chicken if you dare, Alabama style)
2 Onions
2 Carrots
1 oz Butter
2 tablespoons extra virgin Olive Oil
1 tablespoon Tomato Puree
2 tablespoons Tomato Ketchup
2 tablespoons Lea & Perrins Worcester Sauce
1 litre Chicken Stock
1 lb Potatoes
Dash of Milk
1 Egg
2 ozs Butter
Sea Salt
Freshly ground Black Pepper
1. Peel and chop the onions and carrots (smallish but not tiny).
2. Lightly fry the carrots and onions in the olive oil and the 1oz butter, just until they start to change colour.
3. Add the beef (lamb) to the partly cooked veg, and brown the meat on a higher heat setting.
4. When the meat is brown and looks cooked (no pink bits anywhere), add the stock to the pan, as well as the ketchup, the tomato puree, and the Worcestershire Sauce.
5. Cook for 20 minutes, letting the liquid reduce (so don't cover the pan).
6. Allow to cool and add salt and pepper to taste (I personally add none at all, as if you are using a commercial stock this already contains salt etc).
7. Peel the potatoes, then halve or quarter them maybe, and boil or steam them until cooked. Drain.
8. Mash the potatoes together with 2 ozs of butter, the dash of milk and the egg. Be very very careful not to put too much milk.
9. Put the minced meat mixture into the bottom of a good sized ovenproof high-sided dish (Pyrex is great). Place the mashed potato carefully across the top, as evenly as possible.
10. Make pretty marks in the top with a fork. Just cus !
11. Cook in a medium oven, 190C, 375F, or Gas Mark 5, until the top is a lovely golden brown colour.
If the top is dark brown (burning) its been in too long !
12. Let the pie sit for 10 or 15 minutes before you eat it.
Enjoy !
Thursday, 15 October 2009
Chocolate & Peanut Chocolates
Every Christmas time and also when I want to make a special gift for someone, or simply want something a bit different to take to a dinner party for the host, I make chocolates.
Deadly chocolates....
With walnuts, glacé cherries, marzipan, almonds, apricots, hazelnuts, marshmallow, crystallised ginger and loads of other things.
This recipe below is from a book I bought a few years ago, in the Australian Women's Weekly series - and the results are one of those things that you simply can't stop eating !!!
Mmmmmmmmmmmmmmmmmmmm
The milk chocolate to drizzle is optional. You could also make them competely with milk chocolate, instead of the dark, if that's your preference.
Chocolate & Peanut Butter Chocolates
1 cup crunchy Peanut Butter (the real American kind, unsalted)
3 tablespoons Cocoa
4 tablespoons Icing Sugar
7 ozs dark Chocolate (melted)
2 ozs milk Chocolate (melted)
1. Mix the peanut butter with the icing sugar (sifted) and the cocoa in a bowl. Mix it really well.
2. Cover and refrigerate until it is firm to the touch.
3. Remove the mix from the bowl, divide in half and form/roll each half into a 10 inch roll.
4. Cut each 10 inch roll into 24 round slices and put them on a foil covered tray.
5. Freeze them for 2 hours.
6. Remove the tray/s from the freezer. Dip each piece into the melted dark chocolate. This is best done with 2 forks, gently, as the excess chocolate can run off between the prongs as you turn the pieces over in the air. Put them back on the tray to set at room temperature.
7. Drizzle or thinly pipe the milk chocolate over the set chocolates in swirly lines.
IF you can prevent yourself from eating them all inside a day, these heavenly bites will last about 2 weeks.
Monday, 12 October 2009
Chocolate Mousse
To kick off the delicious chocolate recipes for this special week, I have chosen one of my fav choc desserts mmmm.
This recipe makes enough for like 6 or 8 people, ish, yet I can easily adjust that to 1 person... and maybe stretch it over a 8 hour period...
Just.
And then feel very sick.
As despite my obsession with chocolate this week, I don't actually ever eat much of it, as even small amounts fill me fast ! How sad !
It works great with Cadbury's Bournville Chocolate (dark), but you can use any bitter, high cocoa content, high quality dark chocolate.
Anyway, here it is.
Chocolate Mousse
200g bar dark Chocolate (at least 70% cocoa or Cadbury's Bournville works great)
4 full size Cadbury's Flakes
1/2 pint double Cream
2 teaspoons dry instant Coffee (a good quality one such as Gold Blend etc)
4 Egg yolks
2 tablespoons Coffee Liqueur
1. Put the dark chocolate bar into a blender, broken into squares.
2. In a pan heat the double cream with the instant coffee until it starts to boil.
3. Pour the hot mix into the blender quickly, put on the lid and blend until the dark chocolate has melted, about 1 minute.
4. Then add the egg yolks and the coffee liqueur, and blend for another 30 seconds.
5. Pour the mix into a bowl and put in the fridge for an hour, maybe more, until it is thick and cold.
6. Take it out of the fridge and whisk it vigorously until it is fluffy, paler, thicker and light. This needs to be for at least 5 minutes, and that's with an electric whisk. Longer by hand.
7. Roughly crumble 2 of the flakes and gently stir them into the mixture.
8. Put the mixture into individual serving dishes or glasses and place them in the fridge, or a cool place, to set.
9. When you are about to serve them, decorate each one with half a crumbled flake.
Sunday, 11 October 2009
Blackberry & Apple Dumplings
I was out this afternoon picking more blackberries, some for yesterday's Spiced Blackberries recipe, and some to store in the freezer for the winter. I use them to make Blackberry and Apple Crumbles, Blackberry & Apple Sauce, wine, cordials, syrups and also to just sprinkle on desserts.
I also like to make Blackberry Dumplings.
I guarantee if you make these, you will be addicted !
Blackberry Dumplings
4 ozs fresh Blackberries
1 medium Bramley Apple (or other cooking apple)
4 ozs self-raising Flour
1 oz Butter
1/4 pint Water
A pinch of Sea Salt
Granulated white Sugar
Some cold Milk
1. Wash the blackberries carefully, so as not to loose any juice.
2. Peel and core the apple. Cut it into quarters, so that you have 4 pieces.
3. Put the flour and salt into a mixing bowl, and using your fingertips, rub the butter into the flour, until you have the texture of breadcrumbs.
4. Stir in 3 level teaspoons of white sugar.
5. Stir in about 4 tablespoons of cold milk, until you have a soft dough.
6. Divide the dough into 4 lumps on a floured surface.
7. Take a piece of the apple and mould one of the dough lumps around it. Make sure that the apple is totally covered.
8. Dissolve 1 tablespoon of white sugar in the 1/4 pint of water in a medium saucepan.
9. Add the blackberries to the pan and bring it to the boil gently.
10. Place the apple dumplings on top of the blackberries, cover the pan and simmer for 25 minutes.
11. DO NOT remove the lid for the first 15 minutes. This is very important.
12. Put one dumpling on a serving dish for each person (4 dishes). Spoon the blackberries over each dumpling.
13. Double cream poured on the side just about finishes this off !
Saturday, 10 October 2009
Spiced Blackberries
This is adapted from a recipe I only found this year. It intrigued me as it was so different to anything I had previously done with blackberries.
I twiddled it slightly to suit my tastes, and sorry I can't remember which bits I twiddled and in what way !
It really is to die for, and very very different.
Spiced Blackberries
2 1/4 lbs Blackberries
1 lb white Sugar
1/2 pint (UK pints) Malt Vinegar
1/2" piece of Cinnamon Stick
1" piece of fresh Root Ginger (chopped but not peeled)
1/2 teaspoon ground Mixed Spice
5 Juniper Berries
5 whole Cloves
3 rose scented Geranium leaves
1. Gently rinse the blackberries. Pick them over to remove all gunky bits and wildlife (insects). Leave to dry as much as possible.
2. Crush all the spices and put them into a 'spice bag', a small muslin bag tied tight.
3. Put the vinegar and the spice bag into a stainless steel saucepan and bring to the boil. Boil hard for 5 minutes.
4. Cover the pan and leave to stand until it is cold. Then remove the spice bag.
5. Put the cold vinegar and the sugar in a stainless steel saucepan and heat it up very gently, stirring often, until the sugar has all dissolved.
6. Add the blackberries to the vinegar liquid, and simmer until they are just tender.
7. Lift the blackberries out with a large spoon with holes in it and put them into hot, dry, sterilised glass jars (4 should be enough as this makes about 4 lbs). Use not metallic lids.
8. Keep the jars of blackberries warm.
9. Boil the remaining syrup hard, until it becomes nice and thick.
10. Add a geranium leaf to each jar on top of the blackberries.
11. Pour the hot syrup over the blackberries in the jars, making sure that they are all well covered.
12. Seal the jars immediately while it is all hot.
Friday, 9 October 2009
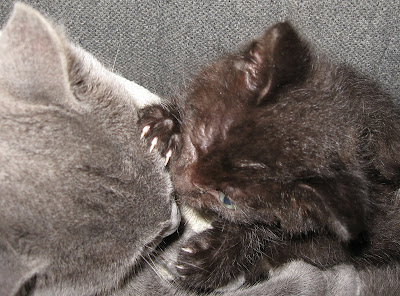
Bathtime for Oisin
 Oh damn, do I have to really have a bath RIGHT now ?
OK well, if I must...

But I won't make it easy...

Wow big brother sure can lick fast...

Now, if I stare him out really really hard...

I might be able to make him slow down and and not clean my ears...
OK it's not working...
I'll just scare him into submission...


OK cute kitty faces on... We are innocent Mom... and if we look sweet she will feed us...

I'll just scare him into submission...
Oisin: OMG she's taking pics of me naked in the bath !
Sweep: Oh damn she caught me

OK cute kitty faces on... We are innocent Mom... and if we look sweet she will feed us...
Chocolate Haberenos, Chillis, Roses and Kittens Killing Caterpillar Boots !

These will blow your head off !!! I grew these fairly conventional chillies this year as they are so much fun...
I don't use them in cooking an awful lot, as I'm personally not a lover of extremely hot food. But they are useful now and then.
Once they are fully ripe on the plant, I pick them and dry them thoroughly. I then grind them up and store them in glass jars until needed.
Today I moved them from the polytunnel, and into my office, as it really is starting to get colder here now at night.

This is another pic of the same plant, once in my office. You can see part of the garden through the office window.

Now this is one very special plant. Like I said above, I don't really eat chillies as such, but I really adore growing them, and all sorts of other things. This is a Chocolate Habereno plant. I bought 10 seeds from a supplier I use, and only 1 germinated...
And this is it.
The chillies haven't formed yet, quite... I am waiting with baited breath ! I moved this plant today also, from the tunnel up to my office.
I can't wait.
I can't wait.

This is my favourite rose.
It's a Zepherine Drouhin, a very old French rose, which is totally thornless, and has a perfume which is the most beautiful smell in the world. It's a rambling rose, not really a climber, and incredibly beautiful, in the sense of true beauty...

And last but not least...

And last but not least...
Meabh and Oisin decided to kill my very expensive Caterpillar boots !
They get hours of endless fun chewing these...
Hmmmmmm
Wednesday, 7 October 2009
Damson or Blackberry Gin
Well hic this is for all those people who hic are 'free food' addicts (ok with the addition of the odd bottle of gin...), hic and who love a wee tipple of something extra hic special...
Hic
Damsons are small dark purple plums hic, which when eaten raw hic aren't terribly sweet like the bigger plums, and are at their best when hic stewed with some demerera sugar mmm hic mmm.
I don't have a damson tree hic yet, nor do I know anyone who has one... which is very sad.
I am going to hic have to try and buy some damsons in order to make Damson hic Gin this year I am afraid. Unless you have some spare ? !! Hic
The joy of this recipe, as well hic as any Sloe Gin recipe, is that it doesn't really require that you use expensive hic gin. Aldi or Lidl cheapo gin works great... and hic saves big time on the pennies...
You can also use this recipe to make Blackberry Gin, which is one very special drink... Instead of pricking the fruit as with the damsons, just gently squash the Blackberries in a bowl with a potato masher, just enough to release the juice. Carefully put the blackberries, and any squashed juice, into jars as in step 2, and continue as for the Damson Gin from there.
I will post my recipe for hic Sloe Gin tomorrow, as it is slightly different...
Damson Gin (or Blackberry)
1 lb Damsons
4.5 ozs white Sugar
A bottle of Gin
1. Wash the damsons and dry them carefully.
2. Prick/slice them all over with a sharp knife and pop them straight into a large glass jar (to which you have a lid that seals). Don't fill each jar to more than half way with the damsons. It would be great if you had one massive jar and they all went into 1. However, several jars is ok.
3. Add the sugar to the jar. If more than one jar, be careful to add the sugar in the near enough correct same proportions as the fruit, to ensure an even sweetness and taste.
4. Fill the jar of Damsons to about 1 inch from the top with gin. Put the lid on the jar (jars).
5. Shake the jar vigorously for a bit, then stand in a cool place, and not in direct sunlight.
6. Shake the jar well every day for the next month. Then shake every few days for 2 months after that (3 months in all).
7. After 3 months strain the Damson Gin through muslin (or a very fine sieve) into a clean sterilised bottle. Seal with a good lid.
8. Leave to mature for at least 6 months, 2 years if you want something really special.
Subscribe to:
Posts (Atom)