Welcome To Wild Cottage

Recipes, wild food, natural remedies, organic gardening, Irish music, eating and thoughts on life in general

Showing posts with label Gardening. Show all posts

Saturday, 3 October 2015

A Recycled Somerset Garden - August 2015

Post author: My daughter Sophie from Somerset, England


"It all started it from a garden of brambles, that is it was full of rampant blackberry bushes and other long term weeds.  

We started clearing it just as I became pregnant with our first child. Home veg was the value we wanted our baby to experience and grow up with, healthy and pure. So it was a real labour of love (excuse the pun).

The first year we lived here, we only just finished the vegetable patch area as we were concentrating on renovating the house itself. Everyone told me it was too late at the end of August to plant veg, but I did it anyway and loads came up !

Our vegetable patch and the recycled greenhouse

This year, 2015, with the new baby on board the garden has become totally green !  

When I began to wean her, her first foods were from our own garden. She started with pureed carrots, and then parsnips, and so on.  

We got other people involved in the garden with the sunflower competition. Once they are finished, we will keep the seeds from the flower heads, to be dried and re used for flowers next year, or for bird seed during the winter and for cooking in the kitchen. Sunflower seeds can be a great snack on their own or in a nice homemade bread. Yummy !


When we initially cleared the old garden we saved some of the plants that were already there when we bought the house. There was a Day Lily for instance, which was beautiful when it came out this summer.

Never waste plants, they cost a lot to replace. We have a grape vine which we recycled from another house. We cut it right back when we got it first. It is now flourishing and is starting to work well in hiding a block wall at the back of the garden.  


In my next Wild Cottage guest post, I will tell you all about the recipes we use for our garden produce, how we preserve things for the winter and the yummy things we cook with it all.

Meanwhile, here are some more photos of this summer's garden (August 2015)."


The beginnings of our herb bed
The bay tree
Mint in a pot to keep it contained !
Runner beans grown up bamboo sticks
Our own chillies from the greenhouse
Red and white onions almost ready to lift
Some of our white onions
Rhubarb patch !
Elephant garlic - this is just one clove !
Normal and elephant garlic
My husband's precious fig tree
Lovely lettuce
Runner beans harvested for freezing and dinner
Sage bush with lots of new growth


Sunday, 11 May 2014

Organic Homemade Weedkiller

If, like me, you are beginning to panic at the sight of all those baby unwanted plants - aka weeds - sprouting in your garden and on your drive and patio, and you refuse to use highly toxic commercial herbicides, then here is an alternative solution.  The answer to all your prayers!
A natural, easy to make at home, safe to use, weedkiller.
Reasonably cheap to make, especially compared to commercial weedkillers.
And no need to worry about harming your pets!
Here are 2 recipes for your homemade weedkiller.  Mix No 1 is for where you want to kill current weeds, and also to keep the ground free from weeds for as long as you can.  Mix No 2 is for where you want to kill selected weeds, and want to plant in the soil immediately, and to leave surrounding plants safe and healthy.
Note:  If you want this to be 100% organic, you will need to use totally organic vinegar, salt and washing up liquid.

MIX No 1  -  Total Weedkiller for Drives & Patios - (nothing will grow in soil for up to 2 years)
  • White distilled vinegar   -  1 litre  (1.8 UK pints/2.1 US pints)
  • Table salt  -  60 grams  (2.25 ounces)
  • Washing up liquid  -  1 squirt
  • Spray bottle
  • Saucepan
Place the vinegar and salt into the saucepan and warm up.  Do not bring it to the boil as there is no need.  Just enough to dissolve the salt properly.
Add the washing up liquid and stir in well.
Allow to cool, then fill your spray bottle and go kill those pesky blighters !
Remember, if you are storing this mixture, to label your spray bottle clearly, or you are going to be rather upset at all your dead prize geraniums and be wondering why nothing will grow!

MIX No 2  -  Weedkiller for Growing Plants Only - (doesn't affect soil, just the plants it touches)
  • White distilled vinegar   -  1 litre  (1.8 UK pints/2.1 US pints)
  • Washing up liquid  -  1 squirt
  • Spray bottle
Mix the vinegar and washing up liquid together well.
Put into your spray bottle and if storing, label it clearly.

  • Both mixtures need to be used on a dry, sunny day.
  • Both will kill almost all plants on contact (provided enough leaf coverage is obtained).
  • Use MIX No 2 (the no salt one) where you want to kill plants in borders, or spot weeds in lawns (be careful as it will also kill the grass), where you still want to be able to grow things in the soil.
  • MIX No 1 (with the salt in it) not only kills the plants that it contacts, but due to the salt content will also stop almost all plants growing in the soil for at least a year - so be careful to use the correct mixture in the appropriate place.  Inland plants won't grow in soil with a salt content!
  • You can multiply up the mixtures for larger quantities for extensive area coverage and/or storage.  But remember to label it clearly!
  • The washing up liquid helps the vinegar to adhere to the leaves, allowing it more time to work at killing the plant.
  • It is the vinegar that does the weed-killing.
  • It is the salt that stops anything growing in the soil.


Now go save yourself some money !!!

Monday, 18 October 2010

An October Day of Gathering Free Food


Blackberries & sloes gathered in my fields.

I freeze the blackberries for adding to crumbles etc during the winter.

I freeze the sloes also, and use many to make Sloe Gin. I will post my personal recipe instructions for this tomorrow.

I also sometimes make Sloe Jelly.


 Moon daisies still flowering in mid October !

 Mushrooms - I'm afraid I don't know what kind these are.
If anyone out there knows please let me know !

A closer photo of the same cute small mushrooms

 These are Shaggy Ink Caps - an edible mushroom that is very prolific around my land and the area in general.

They must be fried/eaten as soon as you pick them, otherwise you will have a pool of black gooey liquid to clear up and totally disappeared mushrooms !

Monday, 20 September 2010

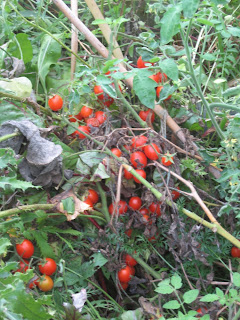
My Tomatoes in the Polytunnel

I took these photos of my various kinds of tomatoes yesterday, just before I picked the really ripe ones to make more of my pasta sauce (which I store in glass jars for the year).


Moneymaker

Moneymaker

Roma

Auld Sud

Italian beef tomato
(can't remember the name so I'll get it tomorrow from the plant label in the tunnel!)

Moneymaker

Moneymaker

Moneymaker

Roma

Monday, 12 April 2010

First Spring Colour in the Garden


These are a few strawberries and radishes that I grow in the tunnel - means I get to eat them earlier !

You can see a small row of early carrots too hidden in between if you look carefully...

Later on this bed will be full of cucumbers, basil, coriander and tomatoes mmmmmmm

These are 8 Patty Pan (scallop) yellow squash plants - this photo was taken about a week ago or more - now they are bigger and potted up into larger pots. When the frosts are gone I will plant a few outside and a few in the tunnel (I cover all bases).

Friday, 2 April 2010

My First Radishes of 2010


Well here they are at last - Today I pulled my first radishes of 2010, in fact my first summer salad veg of the season !

These were grown in well manured soil in the polytunnel, in between new rows of Cambridge strawberries (I'm after an early delicious crop).

The donkeys love the radish tops, so they are yet another part of the recycling process - they eat the radish tops, they create manure, it rots and dries, and then I use it a year or 2 later on the garden and raised beds...

Below is today's organic lunch (or was as I have eaten it all about 2 hours ago). I'm afraid only the radishes were from my garden.


Sunday, 28 March 2010

New Blackcurrant Patch

I take great pleasure in making something from nothing, and being on a very tight budget and physically less able than I'd like, I had to think creatively when I wanted to make a new blackcurrant patch.


I cleared the land of the tall grass, stones and weeds with a battery strimmer (no laughing - it works, and I can't pull start the petrol one any more). I then aquired a load of used car tyres from a local tyre place (for free) and placed them about 4 feet apart in a grid. This means that the bushes will be about 5 or 6 feet apart.


I then weeded as best as I could inside each tyre, added a layer of well rotted donkey manure, then added soil from an old heap created when land was cleared for my polytunnel.


I planted the blackcurrants (pot grown from pruning trimmings from a friend's bushes) one into each tyre, sprinkled some organic chicken manure pellets around them and then watered them well.


You may wonder why I didn't plant them straight into the ground.


I'm no longer as physically able as I would like and have to make everything super easy to maintain. All I have to do is strim all around the tyres now, and weed the soil inside the tyres now and then when seedlings appear.


As a PS - If anyone would like free used tyres (car or tractor etc) my local tyre fitter is very willing to let anyone have what they want for free. The tyre recycling company actually charge him £1,500 to take away an artic's worth of used tyres ! And they then go and make a profit on them when recycled !


I'm happy to give his address/location to anyone interested.


Here is a quick snap of the new blackcurrant patch. As you can see I still have my work cut out with a load more clearing etc ! But it's way cheaper than a gym membership...